
This guide will help calendar users set up their account and begin posting events to the calendar. If you are a designated Event Approver, click here for the Approver guide and click here for calendar FAQs. For questions not covered in these guides, please email calendar@ucmerced.edu.
Go to events.ucmerced.edu and then click the log in link.
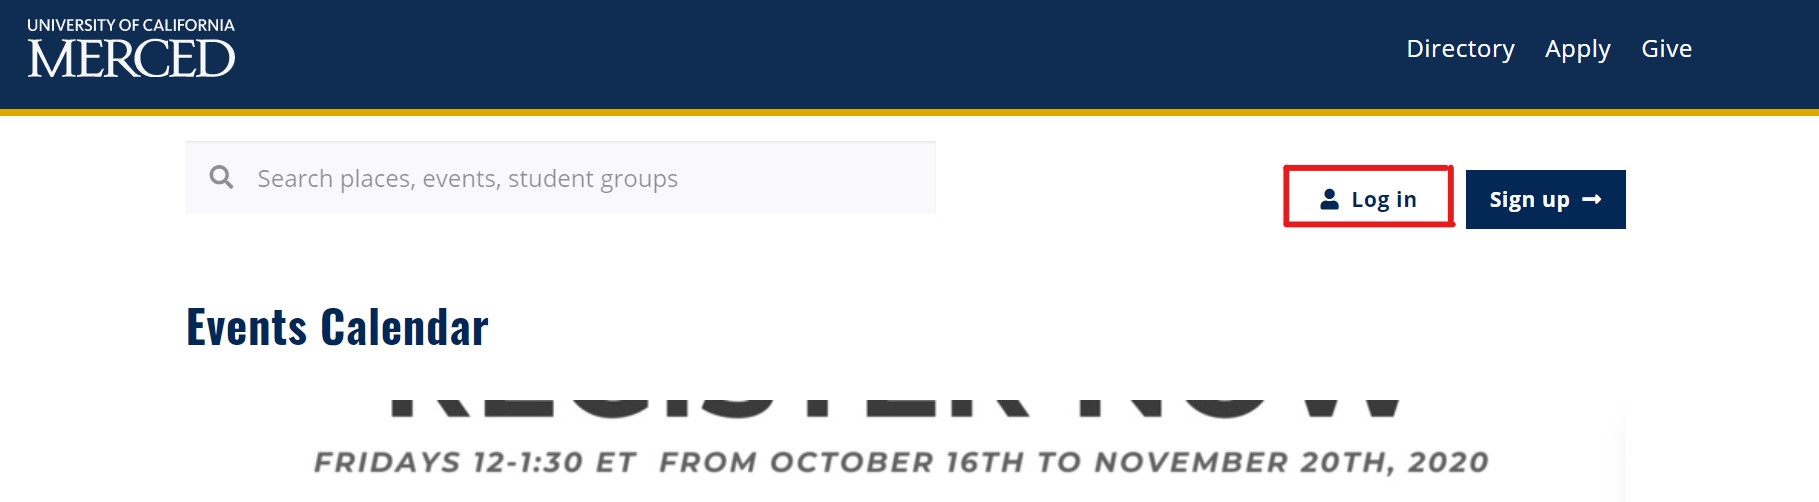
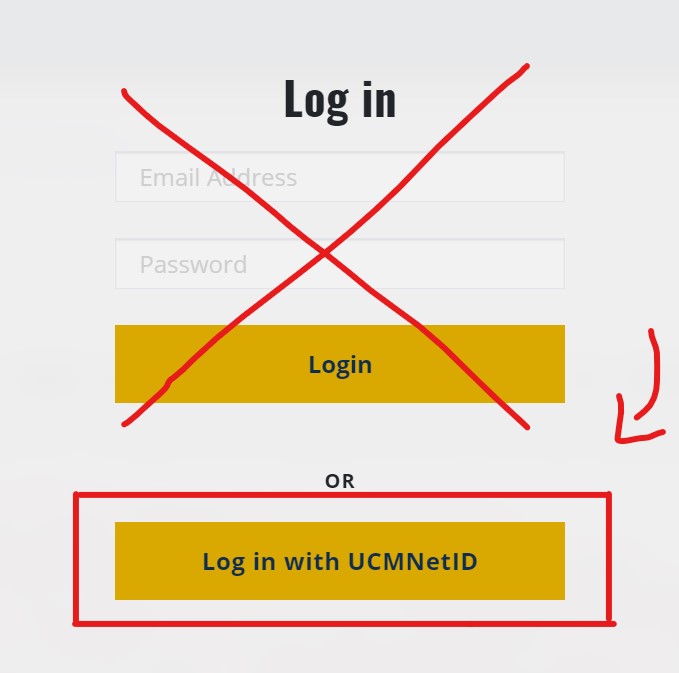
On the pop-up screen, be sure to select the second button “Log in with UCMNetID”
You will be prompted to enable two-factor authentication, then you will be taken to the Events homepage.

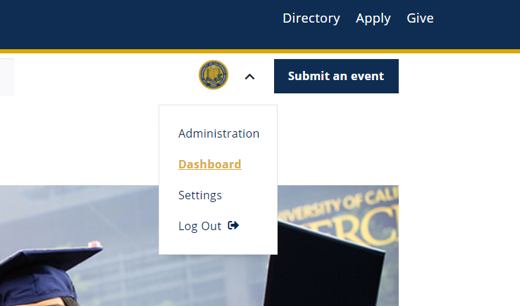
To set up your account, /click the user dropdown, which appears on the upper right side of the page next to the Submit Your Event button (see above image – note that only administrators will have the “Administration” link), then select Settings. By default, you will see your Account Settings. Those with an asterisk (*) are required:
- Photo
- Full Name*
- Email Address*
- Zip code
- Pronoun
- Birthday
- Connect with Twitter
- Connect with Facebook
- Connect with Google
- Connect with LinkedIn
- Change password
All users are opted in by default to receive all notifications. You can change which notifications you receive at any point in time. To access Notifications settings, navigate to Settings page by clicking your profile dropdown, which appears on the upper right side of the page next to the Submit Your Event button, then select Notifications. You can change your notifications settings for the following items:
-
Someone sends me a message, friend request, or event invitation
-
Someone accepts my friend request or event invitation
-
Someone comments on an event I’m attending
-
Details change on an event I’m attending
-
A friend RSVPs to an event I’m attending
-
I submit an event, or an event I’ve submitted is approved or rejected
-
Digest of tomorrow’s plans
-
Reminder to leave a review for an event I attended
-
Periodic ‘trending events’ newsletter
Note: You will not receive any notification emails until you verify your email account.
To access Privacy settings, navigate to your Settings page by clicking your profile dropdown, which appears on the upper right side of the page next to the Submit Your Event button, and select "Settings" and select “Privacy.” By default, all user profile information can be viewed by Everyone. Other privacy options are Just My Friends (applies to friends with a calendar account), and Nobody. You can change Privacy settings on the following:
- Main profile
- Upcoming plans
- Events I’ve attended
- My followed places
- My friends
- My recent comments and reviews
- My photos
To see the full list of upcoming events, go to the Localist Calendar homepage. By default, the newest and most subscribed-to events for the next 30 days are shown in the “trending” setting. You can easily sort these events by date when you click on the “by date” link at the top of the events list, or you can filter through the list to find virtual events by clicking “virtual” at the top of the events list. You can scroll through the events manually, search for a specific event by entering keywords into the search bar, or you can use the filter function to narrow down the upcoming events to your specific interests.
Subscribing & Adding Events to Your Calendar
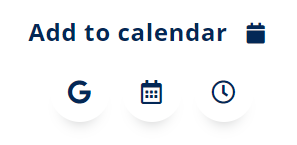
Once you find an event you’re interested in, you can select “I’m Interested” and you will officially be subscribed to that event. You can also save the event to your personal calendar by clicking on the icons which appear in the upper right side of the event posting.
Creating and Submitting Events
In order to submit an event, you will need an event name, a description of your event, a time and date, a physical location or a link if it’s a virtual event. If you are planning on reserving a physical location on campus, you must receive confirmation of your space reservation through EMS or Astra prior to designating a location for your event on Localist. From the Localist calendar homepage, click on the blue Submit an Event button on the upper right hand side of the page.

Please Note:
Prior to being accepted, your submission will be checked to ensure:
- That no inappropriate language/messaging is included. No curse words, please.
- No racial, religious or gender slurs will be accepted.
- No context that reflects poorly on the campus, campus community, or any member of the campus community, UC Merced supporter or friend will be accepted.
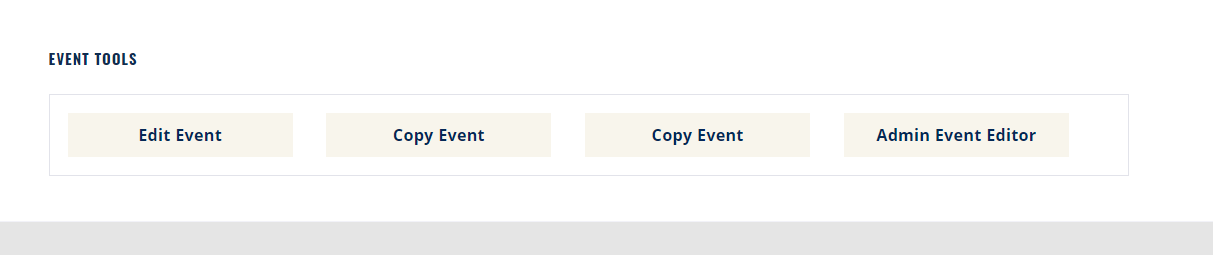
If your event gets rejected for any of these reasons, you will be informed via email and you will have to go back to your event page and edit your event prior to resubmitting. Once you submit an event, you will be able to make edits by scrolling down to the bottom of the page to the Event Tools section and clicking the edit button.
While creating your event posting, be sure to fill in as much detail as possible.
Please note that in observance of physical distancing policies, most if not all events will need to have a remote option. When you are scheduling your event, whether it is fully remote or a hybrid (in-person and virtual) event, please be sure to select “Virtual” as an event type in the Filters section. This will allow you to connect with attendees who are only able to attend virtual events.
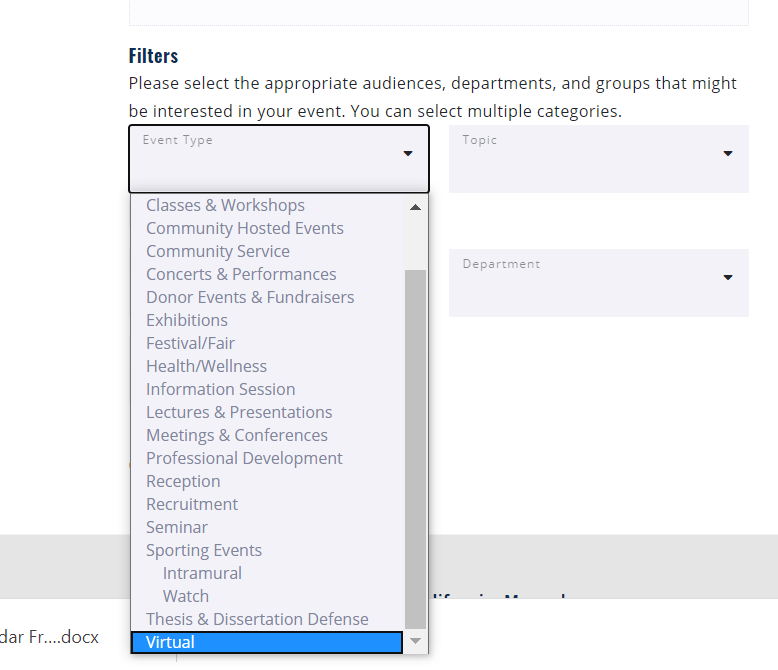
In the Filters section, select any Event Types, Topics, Target Audiences, Departments, and Groups that make sense for your specific event. You may select multiple filters for each category. The more tags you select, the more possible ways to reach people who could be interested in your event.
As an example, if you tag your “Yoga for Grad Students” with the Health & Wellness and Social Event Types and the Graduate Students Audience Type, your event will reach anyone who uses the calendar and searches on or subscribes to information related to those tags.
Once you’ve completed the form and clicked “submit,” you will receive an email from the system in your inbox:
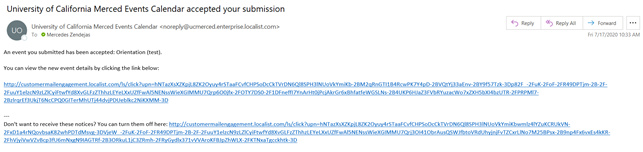
Your event will remain pending until an administrator has approved your submission. Please be sure to factor approval time of 2 business days into your event planning. If you notice that your event has not been approved within two days, please email calendar@ucmerced.edu and we will look into it.
Building a Digest to Receive Custom Lists of Upcoming Events
WHAT'S A DIGEST?
Digests are like Happenings—but much, much more personalized to the information YOU want to see. Digests are a great way to stay informed and engaged in the campus community without having to proactively visit the calendar site or search for events on a regular basis. Once you build your digest, it will email you a personalized list of events related to your interest areas and the groups and departments you subscribe to. You can even pick which day the digest will arrive in your inbox – and how frequently it comes.
To get to the digest builder, click on your account dropdown menu and select Dashboard.
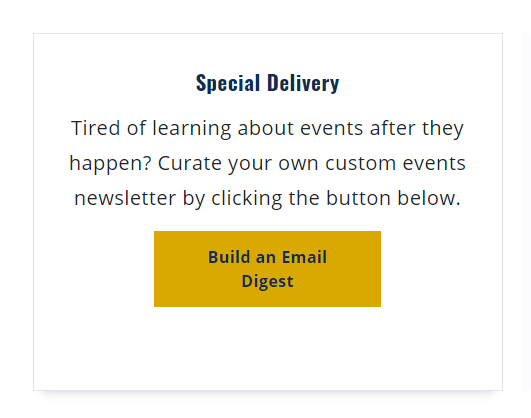
Once in your dashboard, scroll over to the left side of the page and scroll down to find this box and click the first button "Build an Email Digest”:
Your digests can be completely customized to match your preferences. Begin with naming your digest —for example “My UC Merced Events” — and then choose the day of the week you want the digest to arrive, how many events (maximum) you want each digest to contain, and which groups, departments, keywords and tags you’re most interested in.
Alternately, you can build yourself separate digests for the different types of events you’re interested in. Psychology major? Build a digest that contains events from the Psychology department, SSHA, and relevant groups and clubs. Graduate student? Create yourself a digest for all events marketed to graduate students. Do you love social events, but don’t always have time to look through what’s being offered? Create a “Social Events” digest. The possibilities are endless.
Select “Save Changes” and your digest(s) will automatically be sent to your email inbox on the day of the week you have selected. After your digest(s) are created, you can always edit or delete them by visiting your calendar Communication Settings. Click Digest and then select the specific digest you want to edit your preferences.
Check out our FAQs page. If you run into issues using calendar that are not solved in this guide or the cheat sheet, please contact calendar@ucmerced.edu and someone will get back to you as soon as possible.


