As a first step, please follow the account setup guidelines provided in the Quick Start User Guide. Once you have logged in and set up your account, follow the instructions below to begin approving events.
On the calendar homepage, go to the dropdown menu under your user image and select Administration. If this link is not showing up for you, please email calendar@ucmerced.edu for assistance.
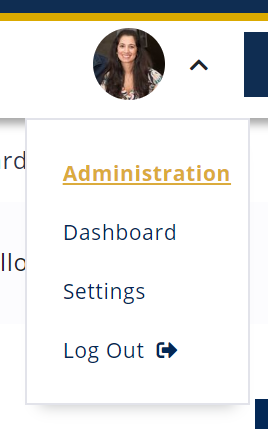
Clicking on the Administration link will bring you to the Localist Admin site where you will see a dashboard that looks like this:
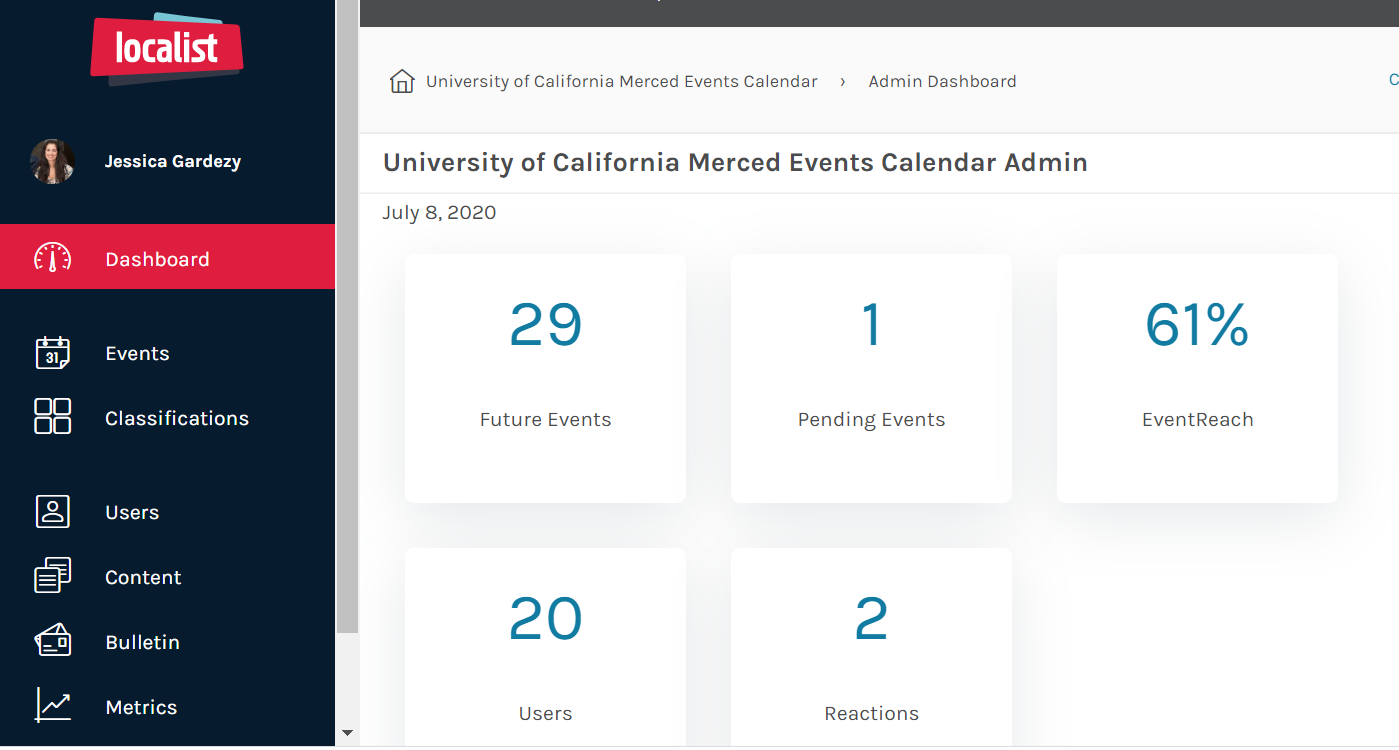
Each approver is set up to only see events that their department/team is responsible for approving. Please note that the other metrics displaying user and reaction numbers are only available to certain administrative levels. If you click on one of those buttons and it takes you to your dashboard, you may not have that level of privilege.
Click on Pending Events to see the submitted events awaiting your approval:
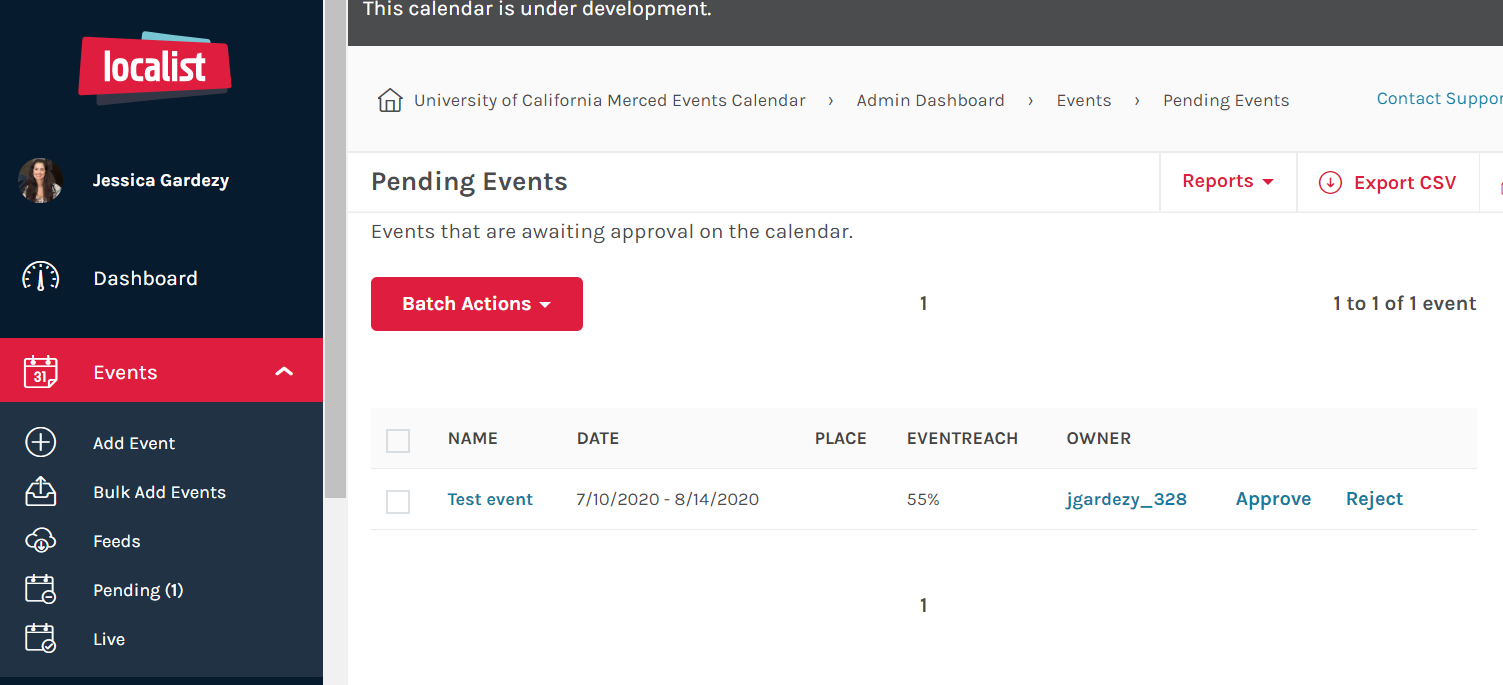
When you click on the event title (in this case, “Test Event”), you will be taken into the event details form (see image below) to ensure each event conforms to the guidelines listed in the Approval Guidelines section below.
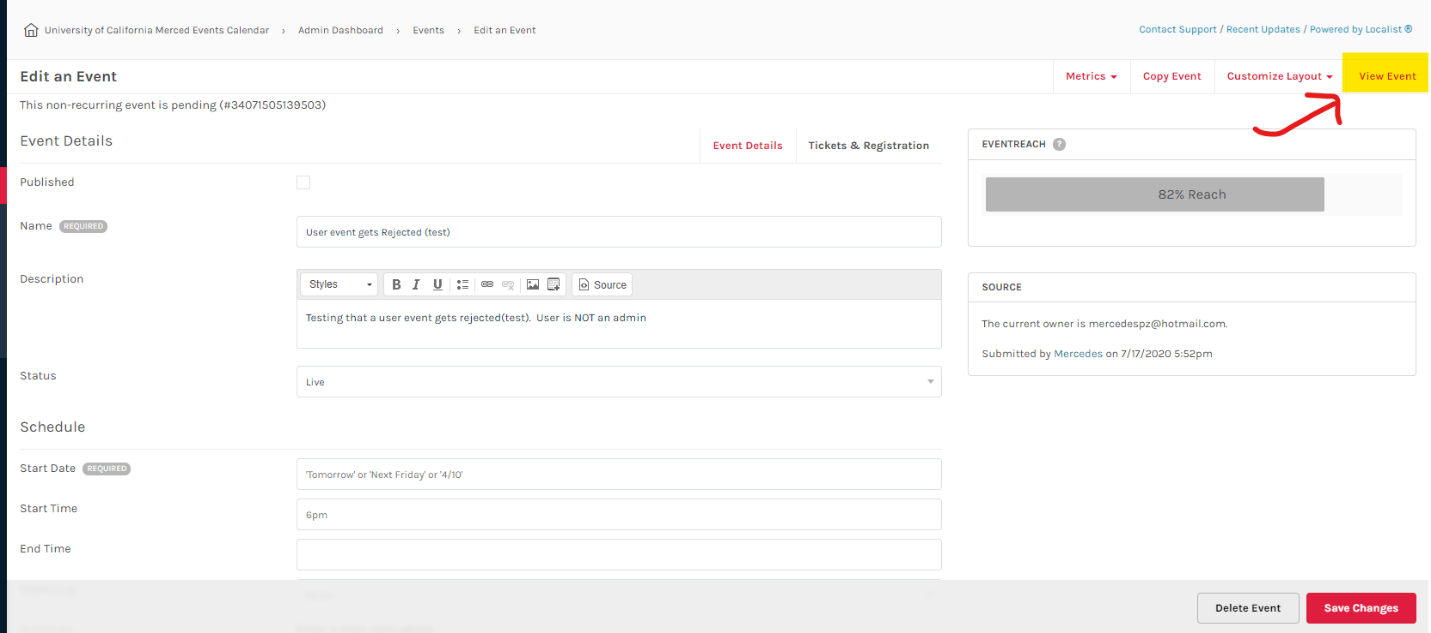
You can review the details in this view, however, we recommend clicking View Event to see how the event will appear to the campus community. Once you have reviewed the event, hit the back button on your browser once to get back to the submission, and once more to get back to the list of pending events.
All events must be evaluated for:
- Inappropriate language/messaging
- No curse words.
- No racial, religious or gender slurs.
- No context that reflects poorly on the campus, campus community, or any member of the campus community, UC Merced supporter or friend.
- Appropriate Branding/Style
- Events hosted or sponsored by the university or a specific department should conform to general UC Merced brand standards, i.e. use proper logos, language, etc.
- Events created, hosted and/or sponsored by students or other independent groups must follow appropriate language parameters specified in #1 above.
- Users may not post personal events that have no campus or club affiliation (for example: yard sales, house parties, et)
- That all essential information is included — time, date, location, cost, sponsor(s), who can attend, whether registration is required (and a link to register, if necessary), contact information, etc...
Once you have reviewed the event details and returned to your Pending Events list, you can approve a single event by clicking Approve, located to the right of the event listing.

When you approve an event, the submission falls off your queue and the event submitter is automatically informed of the approval via system email.
Please note that rejecting events will fully remove the event from your queue until it is resubmitted by the event submitter.

If the event does not conform to guidelines, you can and should reject the event by returning to your Pending Events list and clicking Reject, located to the right of the event listing.
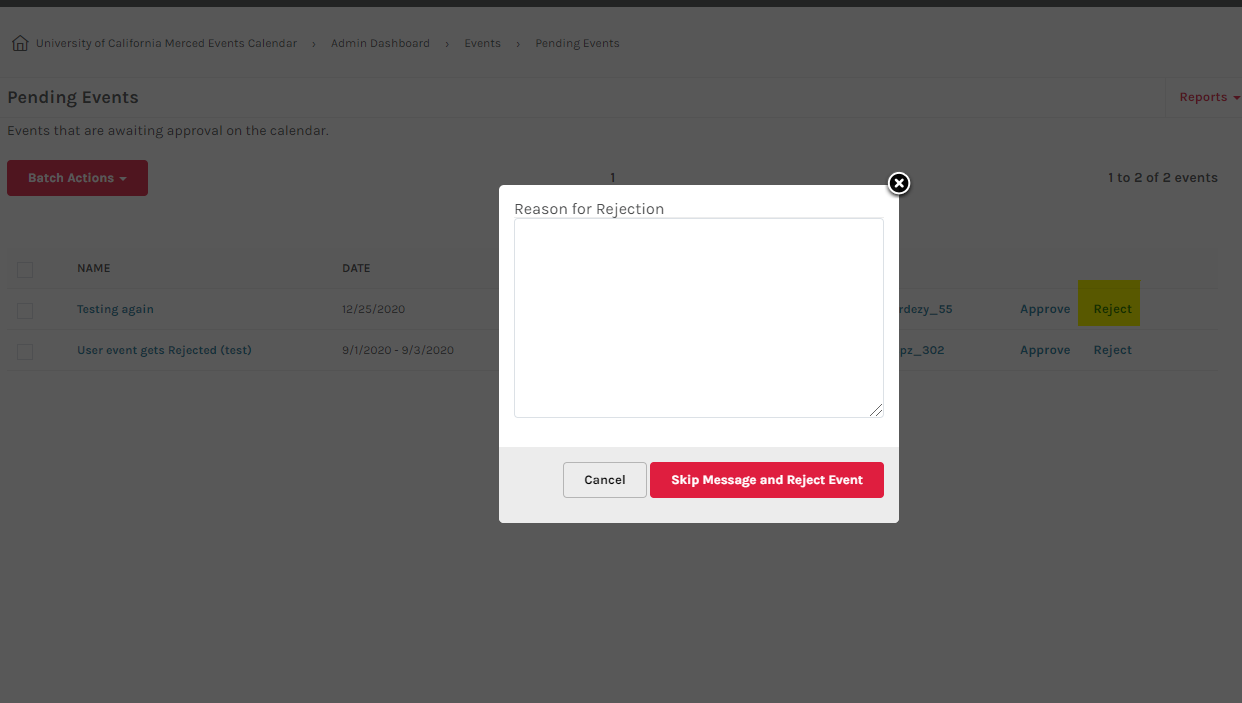
When you click Reject, a comment box will pop up. Use this box to indicate why the event was rejected and what changes need to be made before the event can be re-submitted. Note that the more information you give here, the better prepared the event submitter will be to make the necessary changes and re-submit.
After you reject an event, two things will happen:
- The rejected event listing will disappear from your queue.
- The calendar will auto-send an email to the event organizer. The email will inform them that the event has been rejected and will show them your comments about why the event was rejected. It will also give them the option of appealing the decision (by replying to the email). Their reply (should they wish to appeal the decision) will go directly to your UC Merced email inbox.
Please note that whether or not their appeal is granted, they still must resubmit their event and that submission must be approved before their event can appear on the Calendar.
Approving or Rejecting Multiple Events at Once
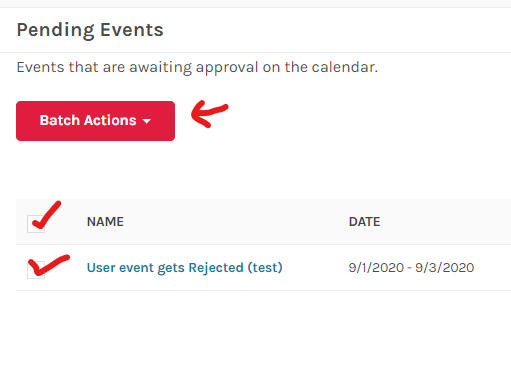
If you have multiple events waiting in the queue that have been submitted by submitters you trust (department staff, etc.), you can batch approve from your Pending Events page. To do this, select the checkboxes to the left of each event, click on the red Batch Actions button at the top of the list, and then click Approve Selected Events or Reject Selected Events (as appropriate).
Check out our FAQs here. If you run into additional difficulties while attempting to approve events assigned to you, please contact calendar@ucmerced.edu.


